How to Calculate the Perfect Concrete Mix Ratio for DIY Projects
For many DIY enthusiasts in the UK, the thought of mixing concrete can seem daunting. Visions of complicated formulas and mountains of aggregate might spring to mind. However, for smaller, non-structural home projects like building a garden path, setting fence posts, or pouring a shed base, calculating the perfect concrete mix ratio is entirely achievable and crucial for a successful, durable outcome.
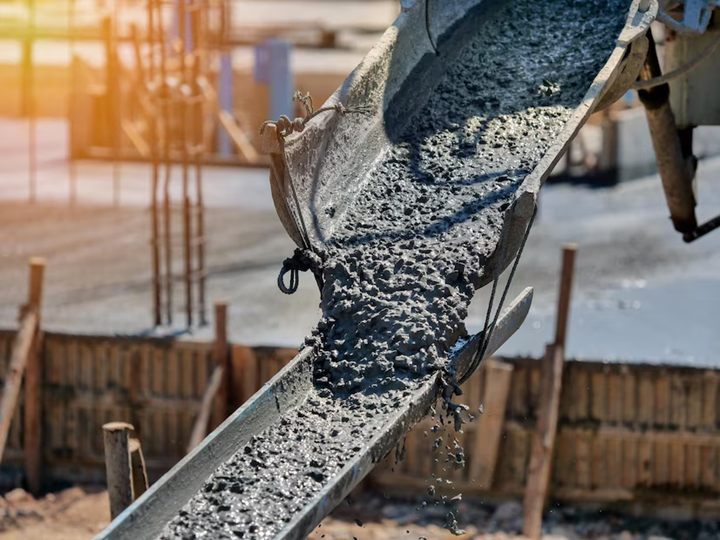
Getting the ratio right ensures your concrete achieves adequate strength, is workable enough to place, and resists cracking and deterioration over time. While large-scale construction relies on precise ready mix concrete, understanding the fundamentals for your DIY project empowers you to create reliable concrete tailored to your specific needs.
The Essentials: What Goes Into Concrete?
Before diving into ratios, let's recap the fundamental ingredients:
-
Cement: The binder. Typically Portland cement in 25kg bags. This is the most critical component for strength.
-
Sand (Fine Aggregate): Usually "sharp sand" or "washed sand." Fills voids, aids workability, and contributes to strength.
-
Gravel / Ballast (Coarse Aggregate): Often "20mm gravel" or "all-in ballast" (a pre-mixed sand and gravel product, simplifying DIY). Provides bulk and strength.
-
Water: Activates the cement and makes the mix workable. Crucially, less water (within limits) leads to stronger concrete.
Understanding Concrete Mix Ratios: The Basic Principle
Concrete mix ratios are typically expressed as parts of Cement : Sand : Gravel (or Ballast). For example, a 1:2:4 mix means 1 part cement, 2 parts sand, and 4 parts gravel.
The amount of water is usually determined by consistency (workability), aiming for just enough water to make the mix workable without being overly wet.
Common DIY Concrete Mix Ratios and Their Uses in the UK
For most non-structural DIY projects, you'll generally be aiming for a concrete strength roughly equivalent to C10 or C20/C25, depending on the application.
1. 1 : 2.5 : 3.5 (Cement : Sand : Gravel) - General Purpose / Light Structural
-
Rough Equivalent: Approximates a C20/C25 concrete, assuming good quality materials and proper water control.
-
Use Cases:
-
Domestic Driveways: For cars and light vehicles.
-
Garage Floors: Provides a solid, durable base.
-
House Floors (Ground-Bearing): For interior ground floors.
-
Paths and Patios: Where moderate foot traffic or occasional light vehicle traffic is expected.
-
Foundations for Small Extensions/Sheds: For structures with typical domestic loads.
-
Why choose it: Good strength and durability for most common domestic construction.
2. 1 : 3 : 4 (Cement : Sand : Gravel) - Less Critical Uses / Blinding
-
Rough Equivalent: Approximates a C15/C20 concrete.
-
Use Cases:
-
Shed Bases (Light Duty): For garden sheds not housing very heavy items.
-
Paving Slabs: For bedding paving slabs.
-
Fence Post Bases: Provides good stability for fence posts.
-
Non-Structural Trench Fills: Backfilling trenches for pipes or cables.
-
Why choose it: Cost-effective for applications where high compressive strength isn't paramount, but stability and a solid base are needed.
3. 1 : 4 : 5 (Cement : Sand : Gravel) - Blinding / Mass Fill
-
Rough Equivalent: Approximates a C10 concrete ("lean mix").
-
Use Cases:
-
Blinding: Creating a clean, level base over a sub-base before laying proper foundations or slabs.
-
Filling Voids: Non-structural void filling.
-
Kerb Haunching: Providing non-structural support for kerbs.
-
Why choose it: Very cost-effective for non-structural applications where easy workability and simple filling are the main requirements.
Important Note on "All-in Ballast": Many DIYers in the UK use "all-in ballast," which is a pre-mixed aggregate containing both sand and gravel. If using ballast, the ratio becomes Cement : Ballast.
-
Typical All-in Ballast Ratios:
-
1 : 4 - 1 : 5 (Cement : Ballast): For general purpose/light structural (similar to 1:2.5:3.5 or 1:3:4 with separate aggregates). Often recommended for paths, shed bases, and footings.
-
1 : 6 - 1 : 8 (Cement : Ballast): For blinding or very lean mixes.
How to Calculate Quantities for Your Project
Once you've chosen your desired mix ratio, you need to calculate how much of each material you'll need. This depends on the volume of concrete required.
Step 1: Calculate the Volume of Concrete Needed (in cubic meters - m³)
-
For Slabs/Bases: Volume = Length (m) x Width (m) x Thickness (m)
-
Example: A shed base 3m long, 2m wide, and 0.1m (100mm) thick.
-
Volume = 3m x 2m x 0.1m = 0.6 m³
-
For Trenches: Volume = Length (m) x Width (m) x Depth (m)
-
For Post Holes: Volume for a cylinder = π * radius² * depth. (Remember radius is half of diameter).
-
Example: A post hole 0.2m (200mm) diameter and 0.6m deep.
-
Radius = 0.1m
-
Volume = 3.14159 * (0.1m)² * 0.6m = 0.0188 m³ (approx 0.02 m³)
Step 2: Use Conversion Factors to Estimate Material Quantities
The following are approximate conversion factors for DIY purposes. They can vary slightly depending on the density of your aggregates and precise moisture content.
|
Mix Ratio (Cement : Sand : Gravel) |
Cement (25kg Bags per m³) |
Sand (Tonnes per m³) |
Gravel (Tonnes per m³) |
Total Aggregates (Tonnes per m³) if using Ballast |
|
1 : 2.5 : 3.5 |
11 - 13 bags |
0.6 - 0.7 |
0.9 - 1.0 |
Approx. 1.6 - 1.7 (if using all-in ballast 1:4/1:5) |
|
1 : 3 : 4 |
9 - 11 bags |
0.7 - 0.8 |
1.0 - 1.1 |
Approx. 1.7 - 1.8 (if using all-in ballast 1:5/1:6) |
|
1 : 4 : 5 |
7 - 9 bags |
0.8 - 0.9 |
1.1 - 1.2 |
Approx. 1.9 - 2.0 (if using all-in ballast 1:6/1:8) |
-
Remember: 1 tonne (t) is 1000 kg.
-
Calculate your total needs: Multiply the volume (from Step 1) by the quantities per m³ from the table.
-
Example using 0.6 m³ for a 1:2.5:3.5 mix:
-
Cement: 0.6 m³ * 12 bags/m³ = 7.2 bags (round up to 8 bags)
-
Sand: 0.6 m³ * 0.65 t/m³ = 0.39 tonnes
-
Gravel: 0.6 m³ * 0.95 t/m³ = 0.57 tonnes
-
If using all-in ballast (1:4 ratio approx): 0.6 m³ * 1.65 t/m³ = 0.99 tonnes (round up to 1 tonne)
Always order slightly more than your calculation (e.g., 5-10% extra) to account for wastage, uneven sub-bases, and to avoid running short.
The Crucial Role of Water (and Consistency)
This is where DIY mixing can go wrong.
-
The Golden Rule: Add water gradually and sparingly. You want enough water to make the mix workable but no more.
-
Desired Consistency: Aim for a "workable plastic" consistency – like thick porridge or stiff oatmeal. It should hold its shape, not be soupy, and aggregates should be fully coated.
-
Test: A simple test is the "slump test" (though more basic for DIY). If you form a mound and it slowly slumps and holds its shape, it's good. If it collapses or is very stiff, adjust water accordingly.
-
Too Much Water = Weak Concrete: Excess water leads to higher permeability and dramatically reduces final strength, making the concrete prone to cracking and deterioration.
Mixing Tips for DIY Concrete
-
Use a Mixer: For anything more than a single post, a cement mixer (electric or petrol) is highly recommended. It ensures thorough and consistent mixing.
-
Add in Order: Typically, add water first, then cement, then aggregates gradually. Some prefer a "sandwich" method to pre-wet aggregates.
-
Mix Thoroughly: Mix until the concrete is a consistent colour and texture, with no dry spots of cement or patches of unmixed aggregate.
-
Work Fast: Once water is added, the chemical reaction begins. Mix and place your concrete within 30-60 minutes, especially on warmer days.
-
Curing is Key: After placing, proper curing (keeping the concrete moist for at least 7 days) is essential for it to reach its full strength. Cover with plastic sheeting, damp hessian, or regularly mist with water. This is as important as the mix ratio!
When to Consider Ready-Mix Concrete
While DIY mixing is suitable for small projects, there comes a point where ordering pro-mix concrete from a UK supplier becomes more efficient, cost-effective, and guarantees quality:
-
Large Volumes: For anything over 1 cubic meter, mixing by hand or even with a small mixer becomes extremely laborious and time-consuming.
-
Critical Applications: For structural elements (like house foundations, retaining walls, or reinforced concrete), where precise strength (e.g., C25, C35) is non-negotiable and certified quality is required.
-
Time Constraints: Ready-mix arrives batched and ready to pour, saving immense time and effort.
-
Consistency: Ready-mix plants use precise weighing and quality control, ensuring consistent strength and workability, which is hard to replicate on-site.
For your DIY projects, mastering the basic concrete mix ratios and understanding how to calculate quantities will empower you to tackle a range of tasks with confidence. Just remember: measure accurately, control your water, and cure diligently for concrete that lasts.